Quick answer
- Give the walkthrough one job.
- Record the flow once; each click becomes a step.
- Explain the choice beside each control, not just the label.
- Preview from a clean start.
- Share one link, and let people explore.
The first demo of a new feature is useful. You explain the idea, show the important interaction and answer a few good questions.
By the fifteenth, you know exactly when someone will ask where to click.
The prototype hasn’t changed. Your calendar has. Whether you’re a product manager getting stakeholders on the same page, or a developer showing how a change works before handoff, the explanation still lives in you, not in the product.
A product walkthrough moves that explanation into the prototype, so people can follow it on their own time. This guide shows how to create one for a working prototype, step by step, using Agentry, a small prototype of an AI agent builder. The flow we’ll walk through is the one everyone asks about: creating an agent.
What a product walkthrough is
A product walkthrough guides someone through a real task in a product, one step at a time. Each step points at a control and says what to do and why. There are three common formats:
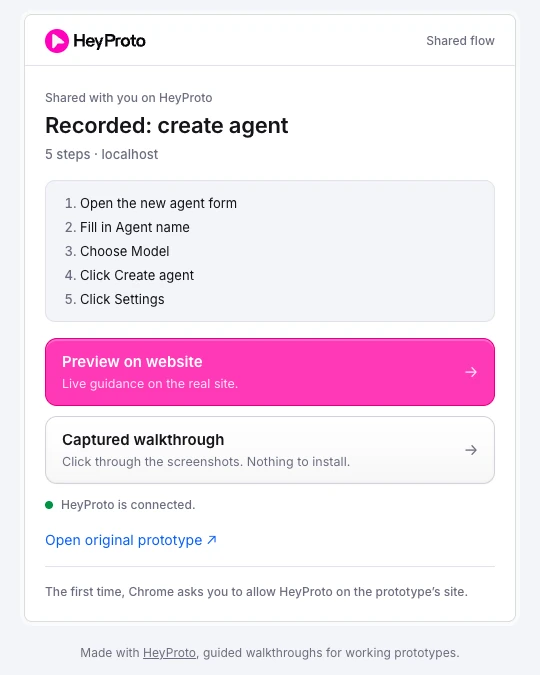
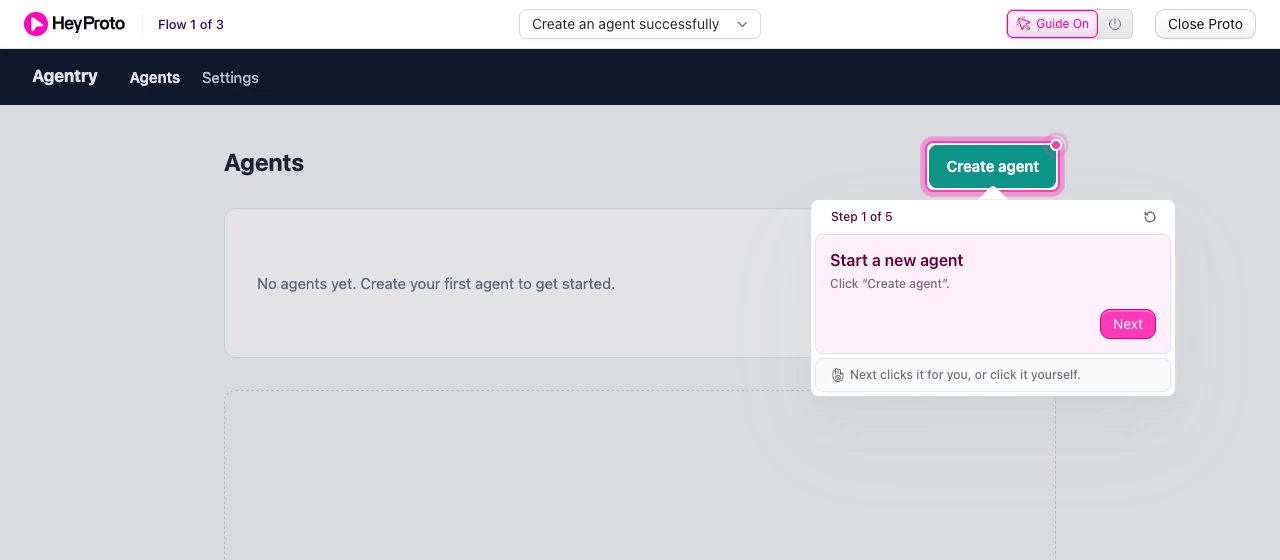
- Live guidance runs on the working prototype. The reviewer clicks real buttons, with the guide on top.
- A captured walkthrough is a click-through of recorded screens. It opens in any browser, but the screens don’t run the app.
- A video shows the flow but can’t be clicked, and nobody can try their own input.
HeyProto makes the first two from one recording. Live guidance needs the HeyProto Chrome extension and access to the site; captured walkthroughs need nothing.
Step 1: Give the walkthrough one job
Repeated demos are a clue. In a meeting you say “start here”, skip the unfinished screen, explain why a setting exists and point out what changed after a click. Those small interventions are what the walkthrough should carry.
Start by naming its job. “Tour the agent builder” is an open invitation. “Create a support bot and choose its model” is a task someone can finish.
That job tells you what to keep. Keep an action if it helps the person reach or understand the outcome. Drop it if it only records where your cursor happened to go. Nobody needs the director’s cut of opening a dropdown.
Step 2: Record the flow once
Open the prototype in Chrome, start recording, and click through the task the way you’d show it. For Agentry, that’s five steps: open the new agent form, fill in the agent name, choose a model, click Create agent, then open Settings.
Every click becomes a step. If you click something by accident, undo it straight away instead of cleaning it up later:

Step 3: Explain the choice beside each control
Recording gives you the route. Editing gives it meaning. Here’s the first step of the Agentry walkthrough in the HeyProto editor:
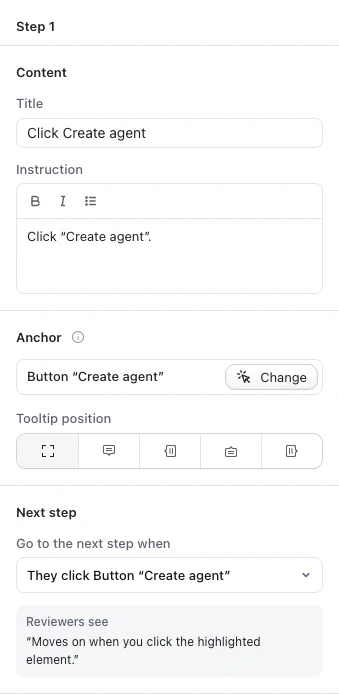
It’s set up correctly. It points at the Create agent button, and it moves on when the reviewer clicks it. The instruction says Click “Create agent”, and for a first step that’s fine, because opening the form is the whole point.
It gets weaker on steps that involve a choice. “Choose Model” helps someone find the menu. It doesn’t tell them why it matters, or what to look at once they’ve picked. Compare:
Pick Thorough. This is a support bot, so careful answers matter more than speed.
Now the choice has a purpose, and the reviewer knows what to look at after the screen changes. The next step should build on that result, not just name the next button:
Create the agent, then check that the Agents list shows Thorough as its model.
That’s the difference between a set of pointers and an explanation. Each step links an interaction to the reason it exists.
Step 4: Preview from a clean start
Before you share, start where a new viewer starts. Open the prototype in a fresh state, not the tab where everything is already set up.
Can you reach the first control? Does the form actually open? Does each instruction still make sense after the screen changes? Can the reviewer see the outcome you’re asking about? In HeyProto, Preview on website plays the walkthrough on your prototype so you can check every step.
Step 5: Share it, and let people explore
Guidance should help someone use a prototype, not turn it into an obstacle course. People will want to check another page, go back to compare, or try an alternative. Let them.
In HeyProto, reviewers can switch the guide off to explore on their own, then switch it back on to return to the same step:

Share the flow with one link. People with the extension follow it live; anyone else can open the captured walkthrough. If you’re sharing an AI-built app, how to share a Lovable prototype covers the handoff in more detail.
When not to guide people
There’s one important limit. Showing someone where to click changes what you can learn from watching them.
If you want to know whether a first-time user can find a feature, don’t highlight it first. A guided review helps people understand a design decision. It can’t show that the same journey is discoverable without help.
- Guide when you want to explain an intended flow and gather informed reactions.
- Don’t guide when you need to see what someone finds and understands on their own.
- Talk when the uncertainty needs a discussion, not just a clearer route.
Keep the meetings that earn their place. The goal is a next call that starts with “Here’s what I noticed”, not “Can you share your screen again?” Getting there also depends on asking for feedback you can act on.
Frequently asked questions
What can I create a walkthrough on?
Working websites in desktop Chrome, including localhost. Browser pages, like Chrome’s own settings, and local files aren’t supported, and some embedded or restricted content may need testing.
Do viewers need the extension?
For live guidance on the website, yes. If you include captured screens, viewers can click through them in a browser without it.
Can I edit a walkthrough after recording it?
Yes. You can change each step’s title, instruction, highlighted element and tooltip position, add steps in between, and update the shared version so the link shows your changes.
How do I know if people finish it?
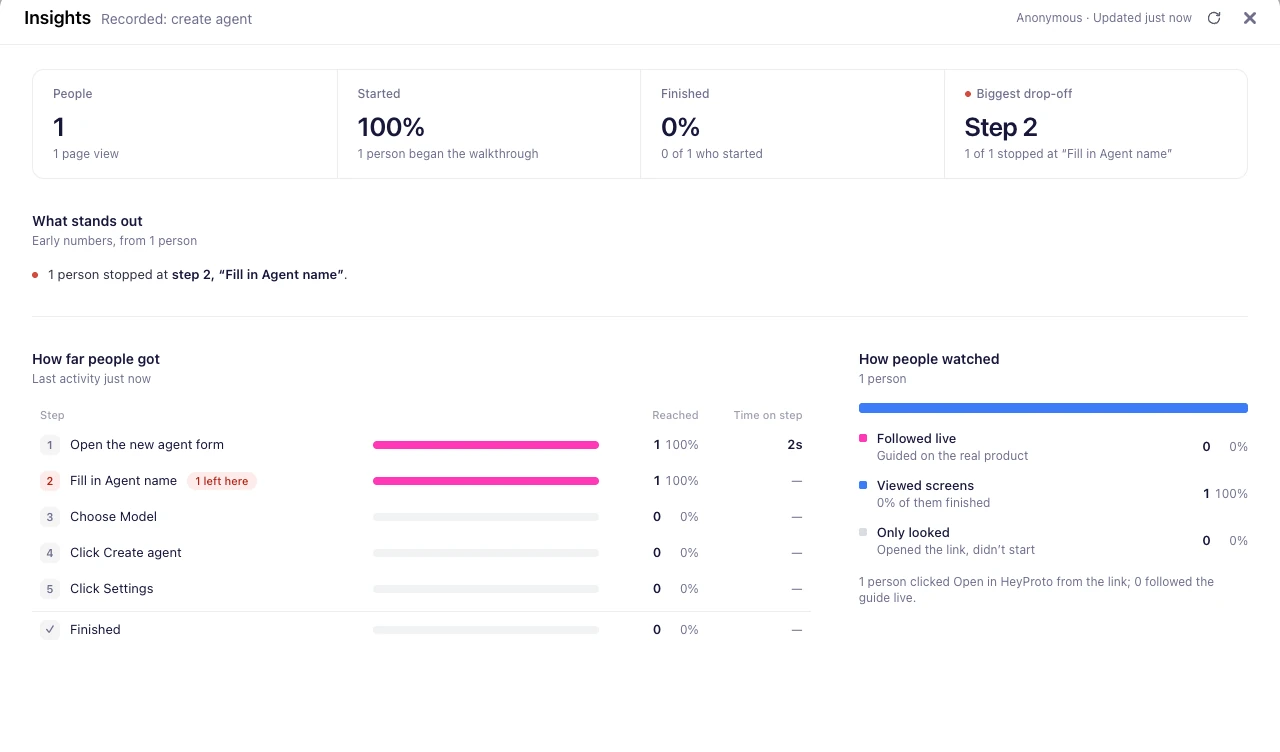
Insights shows how often a walkthrough is opened, started and completed, and which steps people reach.