Quick answer
- Publish the app and check where the URL lands.
- Write a short brief that names one decision.
- Record the path as a guided walkthrough.
- Share one link: live guidance with the extension, or captured screens without it.
- Open the link in a fresh window before you send it.
You built a working prototype in Lovable. You publish it, paste the link into Slack, and wait.
The first reply: “Where should I click?”
The next: “Is this the right screen?”
Then someone suggests a quick call, and your prototype becomes a meeting.
A published link gives people access. It doesn’t tell them what you built, where to start, or what you want to know. This guide shows how to share a Lovable prototype so people can understand it, try it and give you a useful answer, without you on the call.
We’ll use one example throughout: Agentry, a small prototype of an AI agent builder. The decision we need feedback on is simple. Should people pick a model while they create an agent, or start with a default and change it later in Settings?
Why a published link isn’t enough
You know which button opens the new feature. You know the empty state is intentional. You know the part worth reviewing starts after the second screen.
Your reviewer knows none of that. They open the link between meetings, with five minutes to spare, and this is what they see:
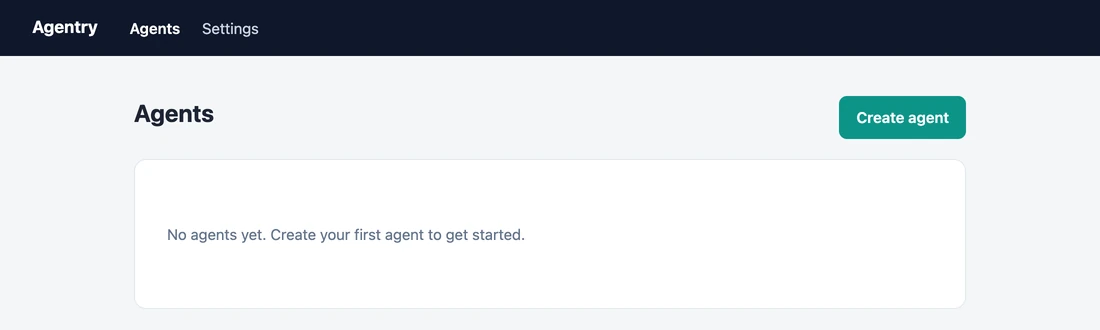
That’s an empty Agents page. Nothing on it says what to try or what you want to know, so the reviewer comments on the empty state. Both of you did your part. You just reviewed different things.
The fix is to send three things with the link: where to start, what you’re deciding, and the path to get there.
Step 1: Publish and check the starting URL
Publish the app first. Lovable’s publishing documentation covers how. If the app needs a login, prepare a test account and share it through your usual secure channel.
Then check where the published URL lands. If the feature lives inside a form, a menu or a modal with no URL of its own, the reviewer has to get there themselves. Note the route. You’ll record it in step 3.
Step 2: Write a brief, not a presentation
You don’t need a long document. A few sentences that name the decision do more than a deck:
We’re reviewing how people create an agent. Click Create agent, give it a name and pick a model. Did choosing a model here feel natural, or would you rather set it later in Settings? The empty Agents page is outside this review.
That brief gives the reviewer a task, a decision and a boundary. Compare it with “Latest prototype. Thoughts?”, which asks them to find the question as well as answer it.
Step 3: Record the path as a walkthrough
Some decisions take several screens to reach. A button opens a form, the form has a choice, and the result shows up somewhere else. That path is the part you’d normally narrate on a call.
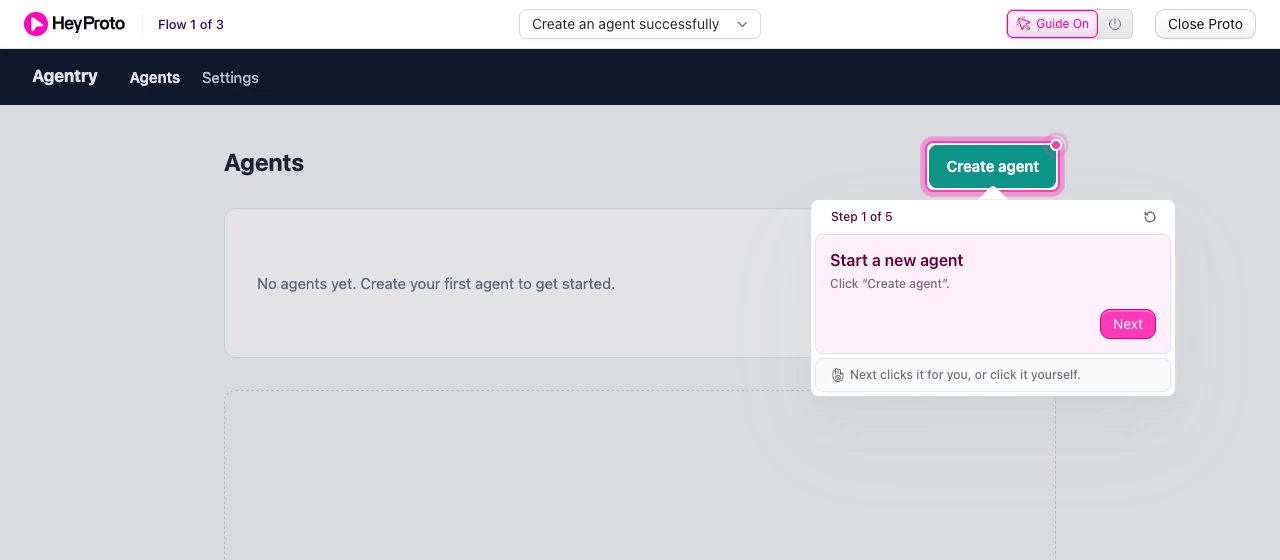
A guided walkthrough puts the narration inside the prototype. With HeyProto, you click through the flow once in Chrome and each click becomes a step. Then you give each step a title and an instruction:
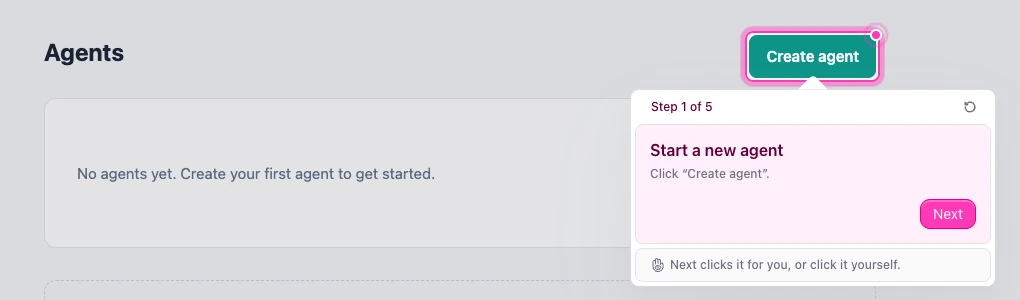
In the step above, the title says what the reviewer is doing, Start a new agent, and the line under it says where to click. Next clicks the button for them, or they can click it themselves.
Write instructions that explain the choice, not just the control. “Choose Model” repeats the interface. “Pick the model you’d expect a support bot to need, then tell us whether the three options made sense” tells the reviewer what to notice. There’s more on writing steps in how to create a product walkthrough.
Step 4: Share one link that works with or without the extension
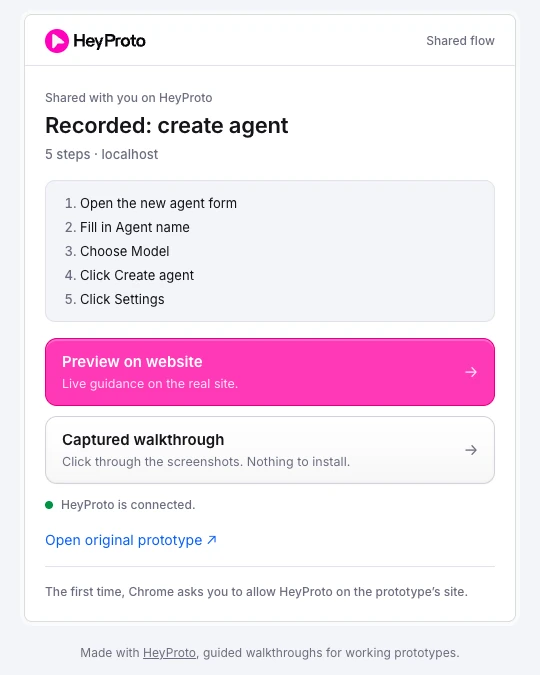
When you create a link in HeyProto, people who open it see a share page like the one at the top of this guide: the flow’s steps, then two ways in.
- Preview on website. The reviewer uses your real Lovable app with the guide on top. This needs the HeyProto Chrome extension and access to the site.
- Captured walkthrough. The reviewer clicks through the recorded screens in any browser, with nothing to install. The screens don’t run your app, so not every control works.
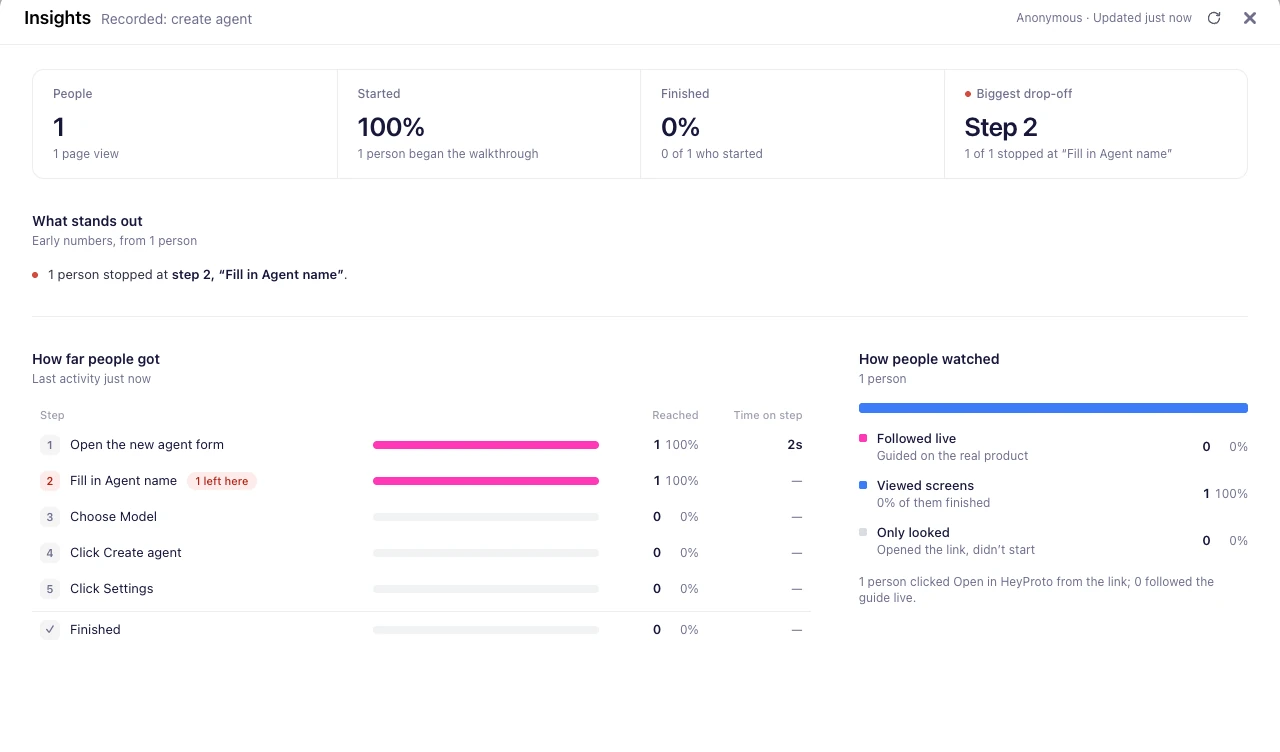
Pick the one that fits the decision. If reviewers need to try different inputs, ask them to use the live prototype. If they only need to follow one proposed journey before a discussion, the captured walkthrough is often enough:
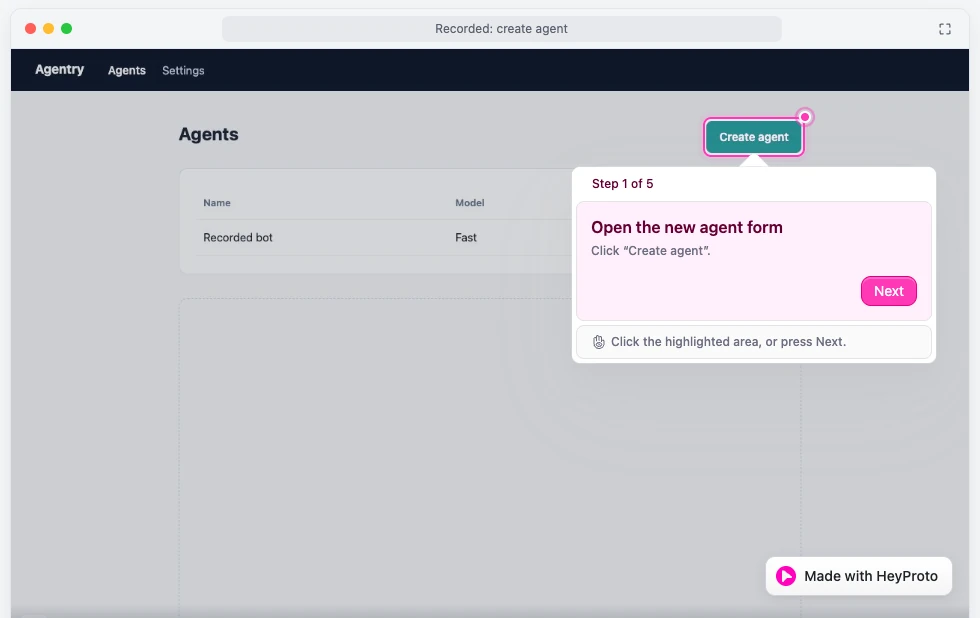
Either way, say which one you want them to use. You can also download the captured screens as a small website, or share a whole project of flows with one link.
Step 5: Open the link like a reviewer would
Before you send it, open the link in a fresh window. Not the tab where the right screen is already open, and not the session with perfect example data.
Can you reach the first step? Does the form actually open? Does each instruction still make sense after the screen changes? If you change the prototype later, edit the walkthrough and update the shared version, so the same link shows the new flow.
The handoff is ready when someone can reach the right screen, understand the question and reply without you narrating the route. Then ask for feedback you can act on.
Frequently asked questions
Do reviewers need to install anything?
For guidance on the live Lovable app, yes: the HeyProto Chrome extension. If you include captured screens, anyone can click through them in a browser without installing anything.
Does it work on a Lovable preview or localhost?
HeyProto works on working websites in desktop Chrome, including localhost. Reviewers need access to the URL you recorded, so share the published app rather than a private preview.
Can I update the walkthrough after sharing it?
Yes. Edit the walkthrough, then update its shared version. The link stays the same and shows your changes.
Is HeyProto free?
Yes. It’s free and needs no account. Recordings stay in your browser until you share or export them.